First-time setup: Difference between revisions
No edit summary |
No edit summary |
||
| Line 20: | Line 20: | ||
[[File:Pi setup8.png|400px|thumb|center]] | [[File:Pi setup8.png|400px|thumb|center]] | ||
'''Note''': nothing will display on the screen, because your Raspberry Pi is not running yet.<br> | '''Note''': nothing will display on the screen, because your Raspberry Pi is not running yet.<br> | ||
If you want to connect your Raspberry Pi to the internet via Ethernet, use an Ethernet cable to connect the Ethernet port on Raspberry Pi to an Ethernet socket on the wall or on your internet router. You don’t need to do this if you want to use | If you want to connect your Raspberry Pi to the internet via Ethernet, use an Ethernet cable to connect the Ethernet port on Raspberry Pi to an Ethernet socket on the wall or on your internet router. You don’t need to do this if you want to use [[WiFi connection to the internet.|wireless connectivity]].<br> | ||
[[File:Pi setup9.png|400px|thumb|center]] | [[File:Pi setup9.png|400px|thumb|center]] | ||
Revision as of 20:39, 2 August 2020
Connect your Raspberry Pi
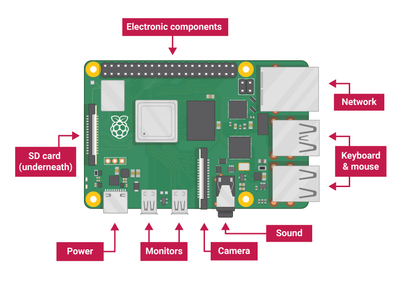
Now get everything connected to your Raspberry Pi. It’s important to do this in the right order, so that all your components are safe.
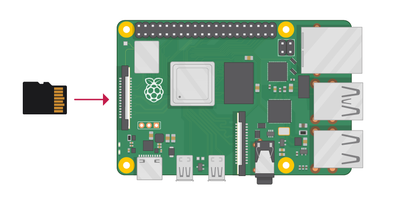
Insert the SD card you’ve set up with Raspbian (via NOOBS) into the microSD card slot on the underside of your Raspberry Pi.
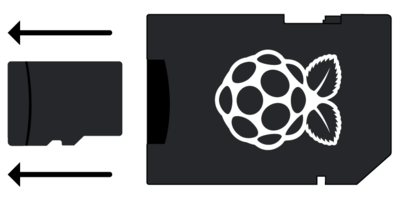
Note: Many microSD cards come inside a larger adapter — you can slide the smaller card out using the lip at the bottom.
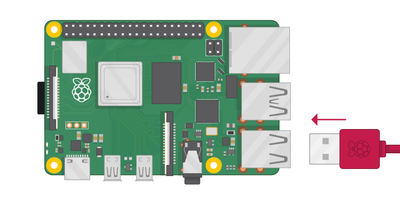
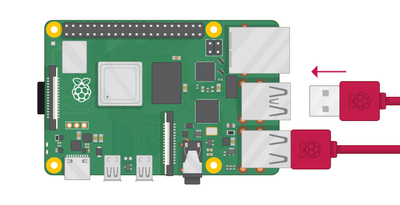
Find the USB connector end of your mouse’s cable, and connect the mouse to a USB port on Raspberry Pi (it doesn’t matter which port you use).
Connect the keyboard in the same way.
Make sure your screen is plugged into a wall socket and switched on.
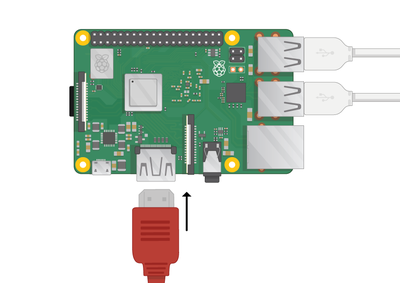
Look at the HDMI port(s) on the Raspberry Pi — notice that they have a flat side on top.
Use a cable to connect the screen to Raspberry Pi’s HDMI port — use an adapter if necessary.
Raspberry Pi 4
Connect your screen to the first of Raspberry Pi 4’s HDMI ports, labelled HDMI0.
Raspberry Pi 1, 2, 3
Connect your screen to the single HDMI port.
Note: nothing will display on the screen, because your Raspberry Pi is not running yet.
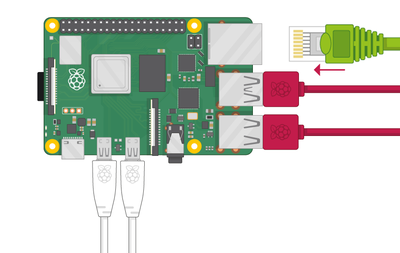
If you want to connect your Raspberry Pi to the internet via Ethernet, use an Ethernet cable to connect the Ethernet port on Raspberry Pi to an Ethernet socket on the wall or on your internet router. You don’t need to do this if you want to use wireless connectivity.
